Posts

Showing posts from October, 2018

Printing Processes

Image
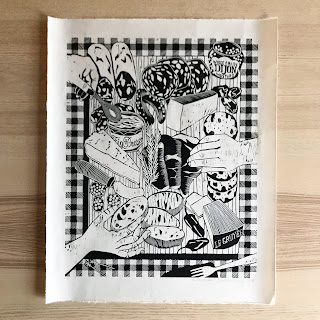
     We reviewed three different ways of printing: ink relief, intaglio, and lithography. They each share characteristics but have many different requirements, steps, and even tools. With different applications, resources, and finished products, each one is important. Ink Relief      Forms of ink relief was first used before the press was invented, so it could all be done by hand. With wood cut, the grain is important for the impressions it leaves in the black areas, while with the linoleum cut the black area is full and unbroken. In both cases, a previously drawn image can be traced or the image can be directly drawn onto the surface. Similar carving tools are used to define the white areas of the image, while places left alone are the black areas. Most styles are either white marks in a black area or small black streaks left in a white area. Many pictures use both is tandem. Once the image is complete, the object is treated properly then ink is applied. A slightly damp piece of p

Pop Art

Image
     One of the more recent tasks we tried was emulating pop art. We looked at many pop art pictures first, several distinct creators, and their personal styles. Afterwards we partnered up and took pictures of each other, using them for the pop art. Creating pop art digitally was definitely a challenge for me. How Did I Go About It?      I wanted a very vibrant theme but I generally stuck to cool colors in the beginning. I tinkered a lot with the specific colors themselves but it was difficult to get a coherent product I liked. I was very meticulous in where the colors went and how they bound to the edges. The shapes in the background were a lot more fun to create than spending forever adjusting and fixing the overlays. What Was My Style?      I quite liked the comic book-esc appearance of Roy Lichtenstein but had difficulty recreating the black outlines and edges. I settled for something a little closer to Andy Warhol's style of giving everything eccentric colors. I liked

Back to the Basics

Image
     One of the things we had to do before we got too deep into any projects was review the basics and also new tools we were not familiar with. This included the Patch Tool, the Clone and Stamp Tools, the Healing Brush, and Content Aware Fill. Once we reviewed these thing we practiced applying them with little photos and a collage. What Did I Do?      I completed each practice image with the help of the tutorial and familiarized myself with the tool in question. Some were very similar. Content Aware Fill would use an algorithm to determine what should logically be in the gap selected. This is handy when you need to clean up something in an image like a wall backdrop with lots of dirty spots.      Cloning was manual for situations that the computer could not determine what looks right (which is often). Cloning is essentially as the name suggests, where you select a model area and stamp it into other places.      The Patch Tool would make the selected area look more like whereve